
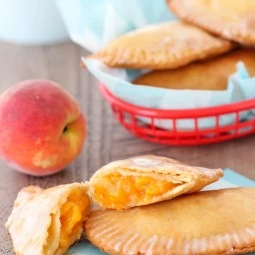
Enjoy a taste of the South with these Peach Hand Pies. Crispy, flaky crusts filled with fresh peach filling and topped with a sweet glaze.
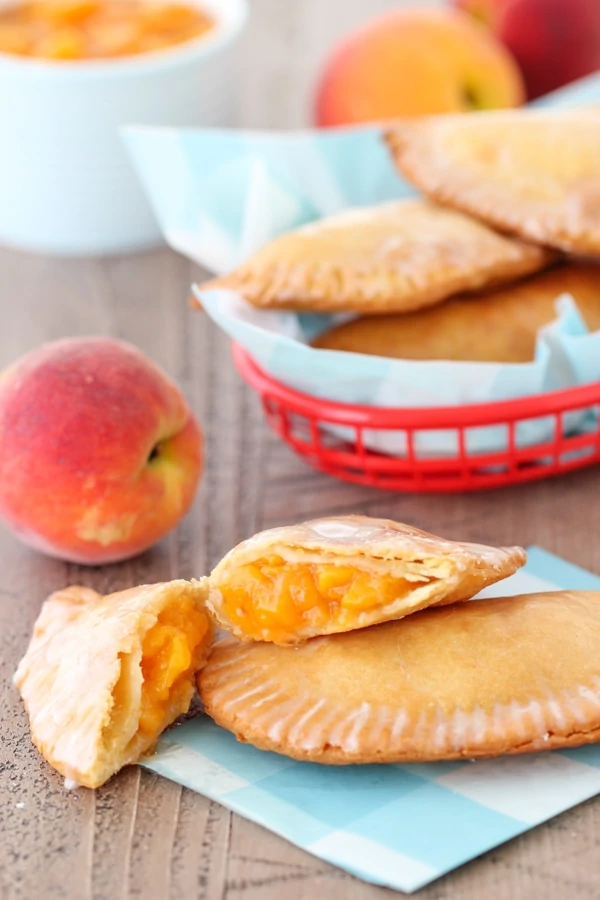
Peach Hand Pies are a perfect summer treat that showcases the delicious, juicy sweetness of fresh peaches. These golden, crispy hand pies have a light glaze and are filled with a burst of fresh peach flavor in every bite. The flaky, slightly sweet dough contrasts beautifully with the fruity filling, making these hand pies an irresistible indulgence when peaches are in season. Whether you're serving them for a dessert or as a special treat, these hand pies are sure to delight everyone who takes a bite.
Recipe from Cook's Country
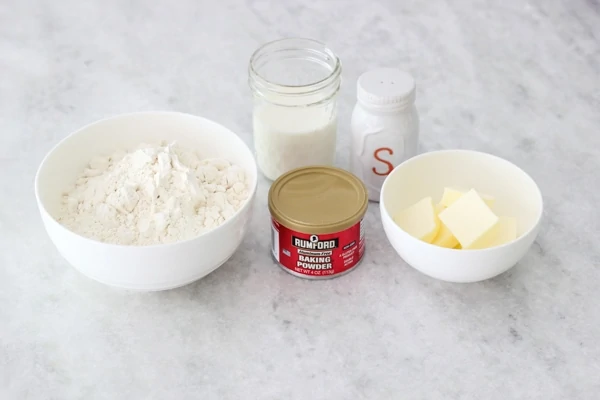
Ingredients:
Peach Filling:
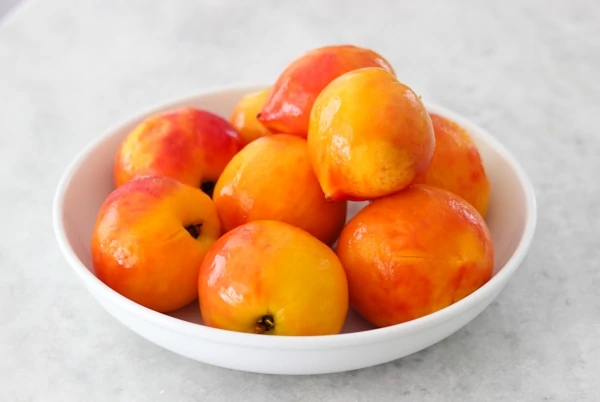
4 large peaches (about 1 ½ lbs)
¼ - ⅓ cup granulated sugar
½ Tablespoon lemon juice
Pie dough:
2 cups all purpose flour
2 teaspoons baking powder
¼ teaspoon salt
6 Tablespoons butter, melted and cooled
½ cup milk
2 quarts of high smoke point oil for frying (peanut, grape seed, avocado, canola, vegetable)
Glaze:
½ cup powdered sugar
2-3 Tablespoons milk
¼ - ½ teaspoon vanilla extract
Instructions:
 Start with making the peach filling, because you will need time for it to completely cool before you can use it. Of course, you can use other fillings too, instead of the peaches. My personal favorite is apple filling, and I use this recipe.
Peel and chop the peaches into ½ inch pieces.
Here's a great tip for getting the skin off the peaches. Cut an X on the top and bottom of the peach with a small paring knife. Boil some water in a pot and then submerge the peaches in the boiling water. 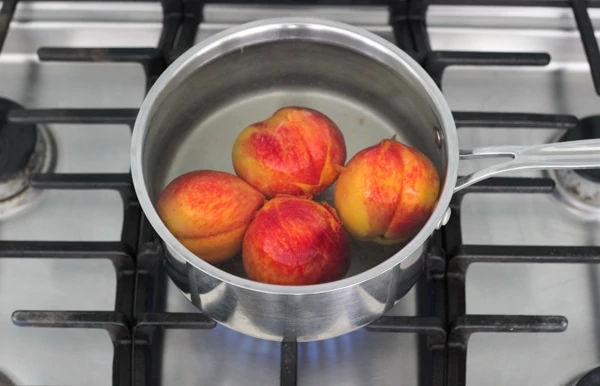 In 30 seconds to a minute, take the peaches out of the hot water and place them into some icy cold water to stop the cooking process.
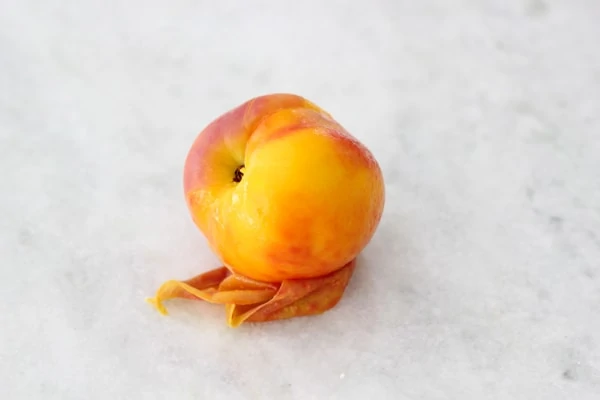
 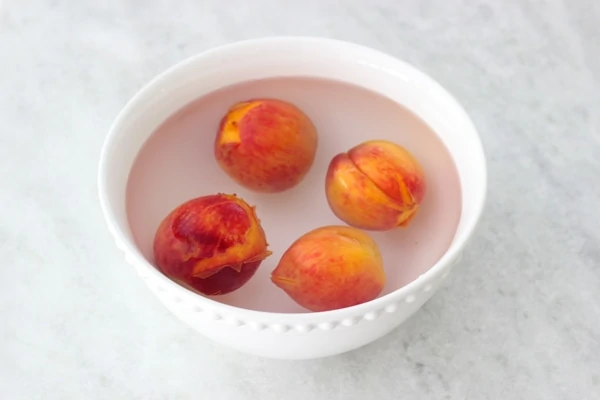 The skin slips right off. You can take it off with your fingers or use a paper towel to help you get a better grip. I use the exact same method to take the skin off tomatoes too.
 Place the chopped peaches and the sugar into a small or medium saucepan. The recipe calls for ½ cup of sugar, but I used only ¼ cup and it was more than sweet enough for me. Use your own judgement.
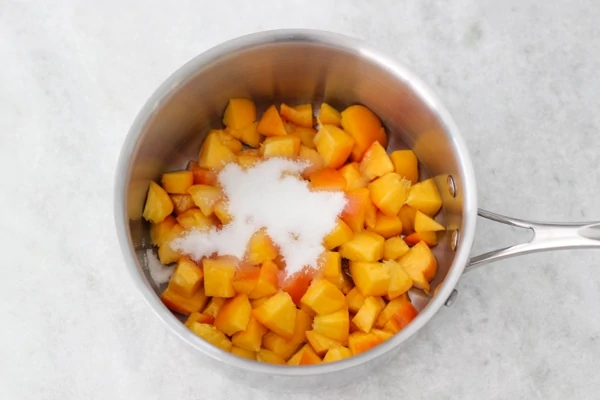 Cover and bring to a boil. The recipe in Cook's Country says that you can use 20 oz of frozen peaches in the filling instead of fresh peaches. I've never personally tried it, but I'm sure it will work great too. It will take a little bit longer for the peaches to come to a boil if you're using frozen peaches though. When they come to a boil, uncover the peaches and cook for another 10 minutes or so, until most of the liquid has evaporated and the peaches are soft.
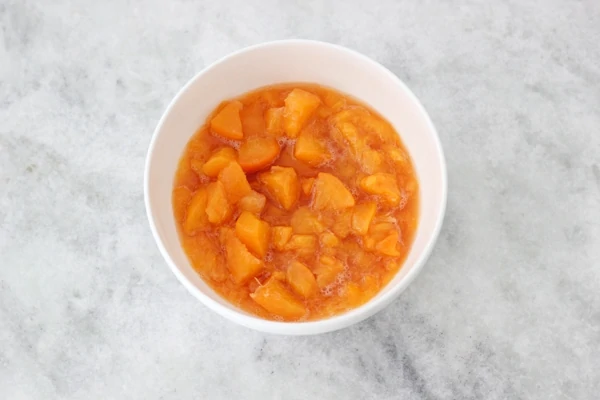
 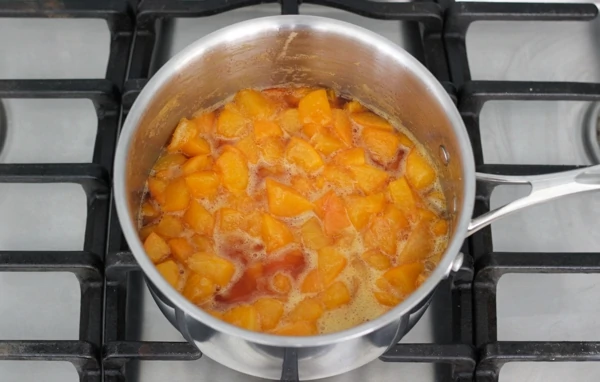 Take the peaches off the heat. Add the lemon juice and mix to combine. At this point, I like to use a potato masher and mash up half of the peach mixture and then add it back to the rest of the peaches. It gives it a chunkier, more even texture, but you still have some nice bits of peaches distributed throughout the filling. Cool completely. You can make the peach filling up to 3 days in advance, just store it in the refrigerator.
 Meanwhile, start making the pie dough.
 Add the flour, baking powder and salt to a food processor and mix to combine.
 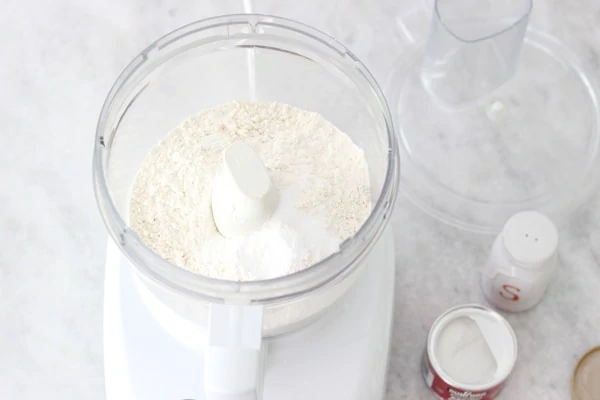 Pour in the melted and cooled butter and pulse the mixture until it looks like wet sand.
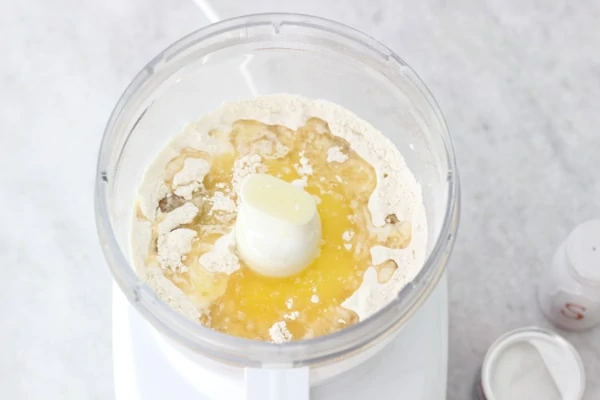
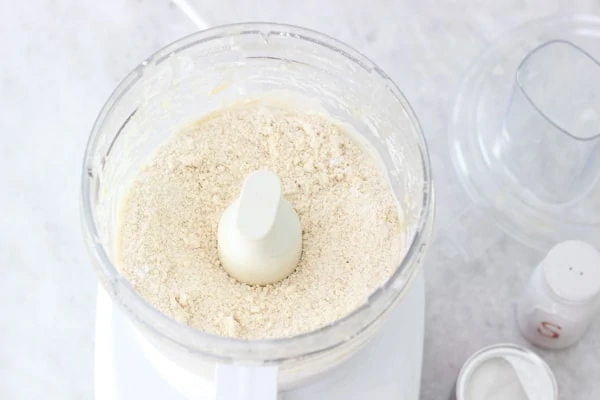 Scrape down the sides of the food processor, then pour in the milk and pulse again until all the flour is incorporated and the mixture looks pebbly.
 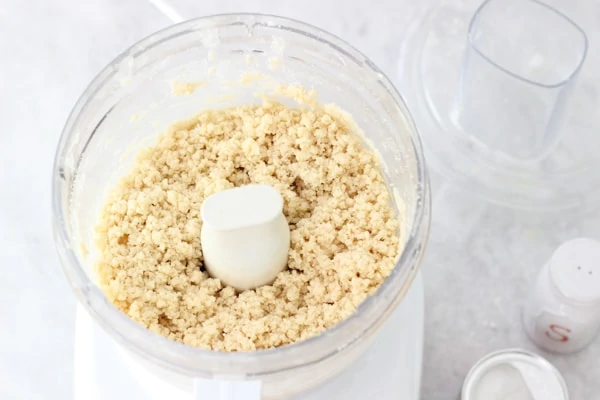 Take the mixture out onto a lightly floured surface and hand mix it, until it all comes together, but be careful not to over mix it.
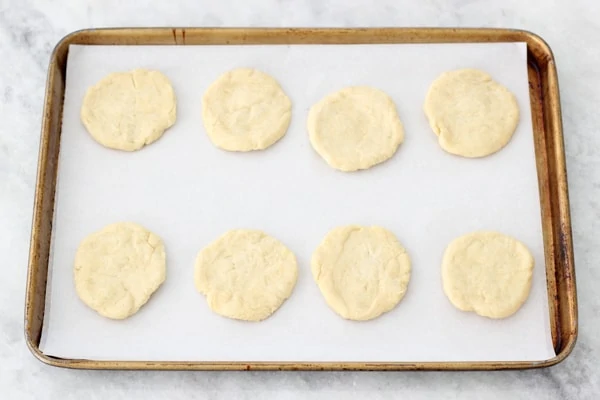
 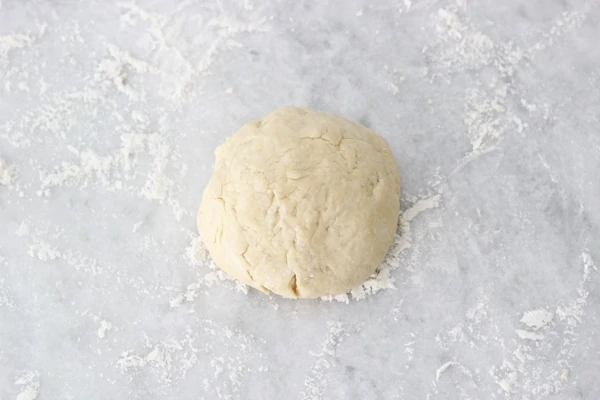 Divide the dough into 8 equal pieces and pat them into small rounds. Place them on a parchment lined baking sheet, cover them with plastic wrap or a clean kitchen towel and refrigerate for about 20 minutes.
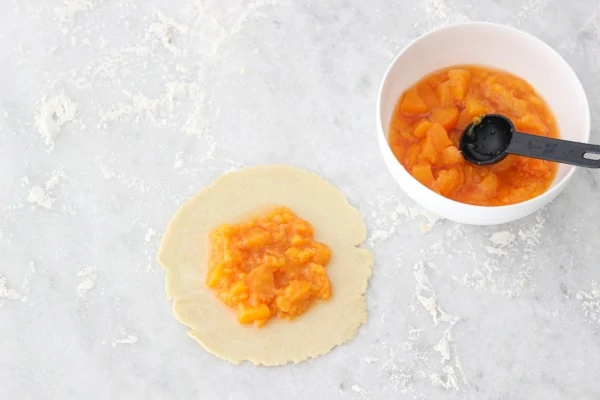
 Take the dough rounds out of the refrigerator and roll each one of them out into 6-7 inch circles. I honestly didn't need any additional flour on my counter to roll out the dough.
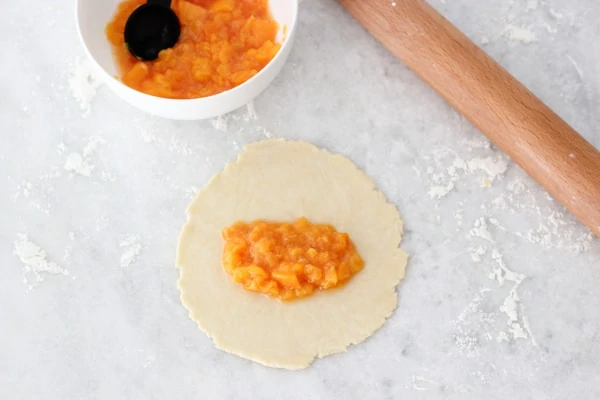
Place 2 - 2 ½ Tablespoons of the peach filling into the center of the dough circles. If the dough is very floury, brush the edges with flour, so they will stick better.
 Fold the top of the dough over the filling and pinch of edges of the dough together, sealing really well, and making sure to get as much air out of the inside of the pies before you seal the edges. Also, try not to get too much of the peach liquid into the center of the dough, since you don't want it to be too wet, otherwise the edges won't adhere well and the hand pies will bust open. Trim the edges of the pies to make them neater.
 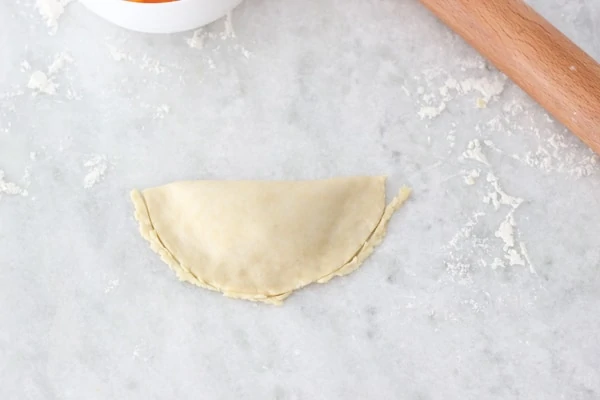 Use a fork to go around the edges and seal them even better.
 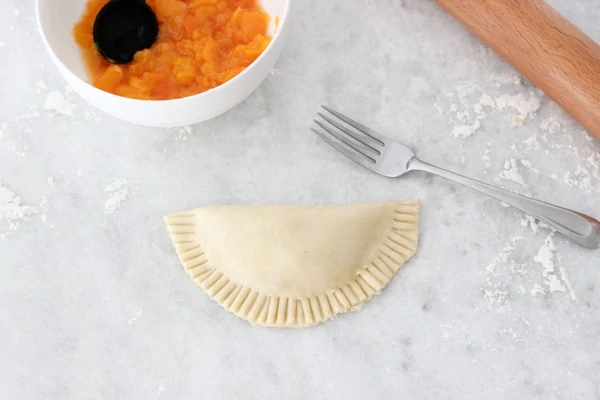 You will have 8 hand pies. You may have some peach filling left over. We love the peach filling so much, I usually make double the amount and we use the leftover filling on top of pancakes, french toast or add it to plain Greek yogurt.
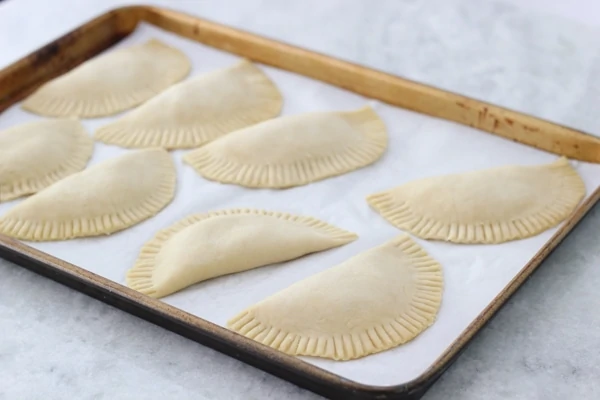
You can form all the peach pies and store them in the refrigerator up to 24 hours before frying them, or fry them right away.
 When you are ready to fry the pies, pour in the oil into a large dutch oven and heat it up to 375 degrees Fahrenheit.
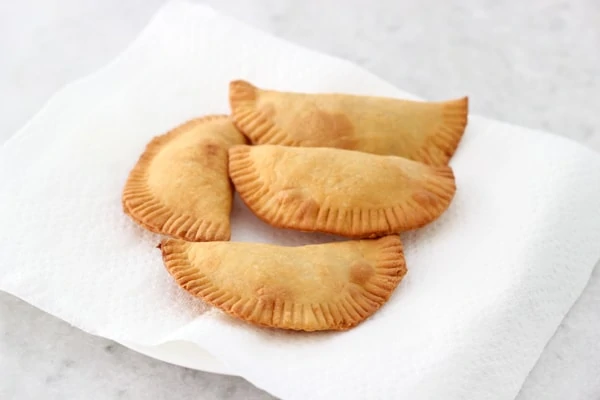
 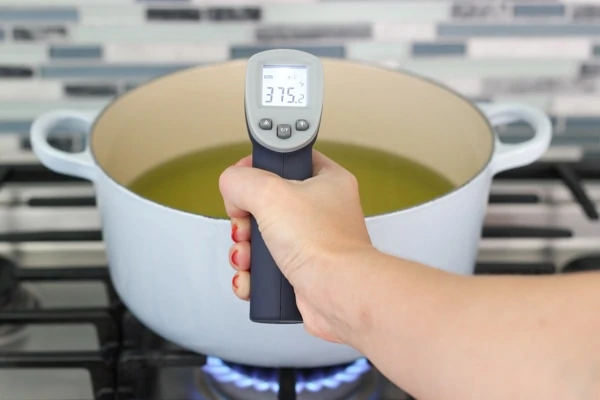 Line a large plate with paper towels, so that you can place the fried pies on the paper towels to drain the excess oil.
It is very important to heat the oil to the right temperature. If the oil isn't hot enough, the hand pies will soak up too much excess grease and the hand pies will be WAY TOO greasy. Yuck. If the oil is too hot, the outside of the pies will get golden brown too fast, but won't cook all the way through.
When the oil comes to temperature, add 4 of the hand pies to the oil and cook for about 1 ½ minutes, flip the hand pies over and cook for another 1 ½ minutes. Keep checking the oil, adjusting the heat as needed, to maintain the temperature to at least 350 degrees Fahrenheit.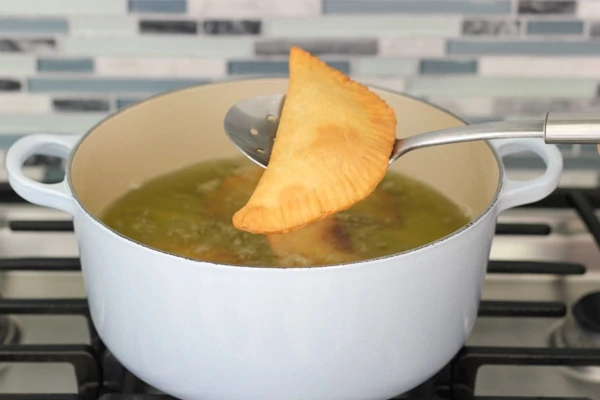
Take the hand pies out of the oil and place them to drain on the paper towel lined plate. Return the oil to 375 degrees Fahrenheit and add the remaining 4 hand pies, cooking them for another 1 ½ minutes per side and then draining them on the paper towel lined plate.
 For the glaze, whisk the powdered sugar, milk and vanilla extract until you have a smooth consistency.
 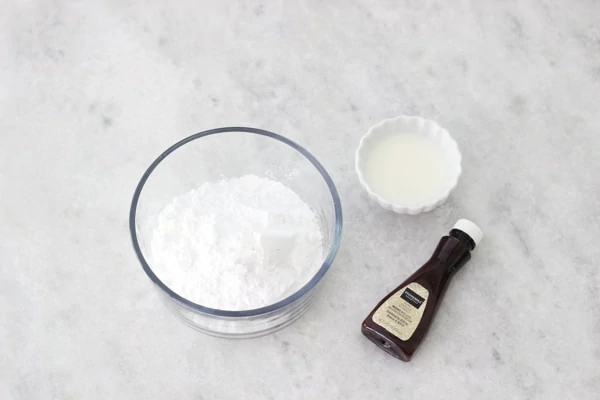 I usually start out with 2 Tablespoons of milk and then add more if the glaze is too thick.
 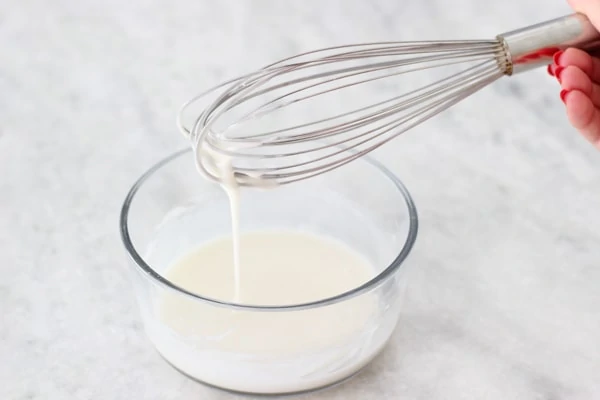 Brush the glaze on one side of the hand pies.
 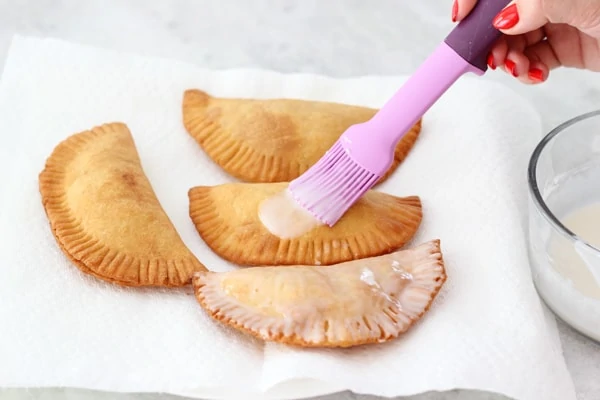 I usually only glaze one side, but you can glaze both sides. It's up to you. Cool for about 10 minutes before serving, so that the hot filling doesn't burn your mouth. Store at room temperature for up to 2 days, although they never last more than a day at my house:).
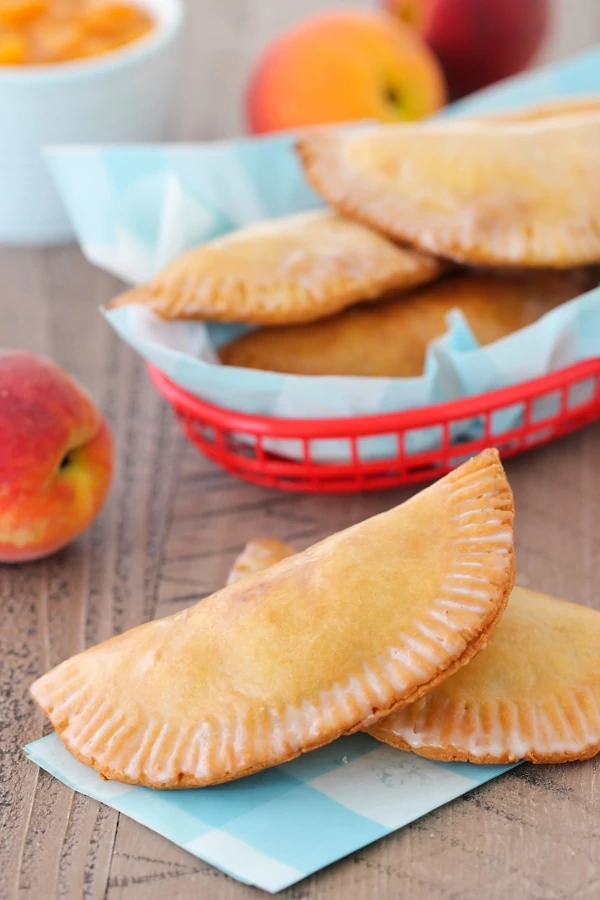
Peach Hand Pies (Fried)
Ingredients
Peach Filling:
- 4 large peaches about 1 ½ lbs
- ¼ - ⅓ cup granulated sugar
- ½ Tablespoon lemon juice
Pie Dough:
- 2 cups all purpose flour
- 2 teaspoons baking powder
- ¼ teaspoon salt
- 6 Tablespoons butter melted and cooled
- ½ cup milk
- 2 quarts of high smoke point oil for frying peanut, grape seed, avocado, canola, vegetable
Glaze:
- ½ cup powdered sugar
- 2-3 Tablespoons milk
- ¼ - ½ teaspoon vanilla extract
Instructions
Peach Filling:
- Peel and chop the peaches into ½ inch pieces.
- Here's a great tip for getting the skin off the peaches. Cut an X on the top and bottom of the peach with a small paring knife. Boil some water in a pot and then submerge the peaches in the boiling water. In 30 seconds to a minute, take the peaches out of the hot water and place them into some icy cold water to stop the cooking process. The skin slips right off. You can take it off with your fingers or use a paper towel to help you get a better grip. I use the exact same method to take the skin off tomatoes too.
- Place the chopped peaches and the sugar into a small or medium saucepan. Cover and bring to a boil. When they come to a boil, uncover the peaches and cook for another 10 minutes or so, until most of the liquid has evaporated and the peaches are soft.
- Take the peaches off the heat. Add the lemon juice and mix to combine. At this point, I like to use a potato masher and mash up half of the peach mixture and then add it back to the rest of the peaches. It gives it a chunkier, more even texture, but you still have some nice bits of peaches distributed throughout the filling. Cool completely. You can make the peach filling up to 3 days in advance, just store it in the refrigerator.
Pie Dough:
- Meanwhile, start making the pie dough.
- Add the flour, baking powder and salt to a food processor and mix to combine. Pour in the melted and cooled butter and pulse the mixture until it looks like wet sand. Scrape down the sides of the food processor, then pour in the milk and pulse again until all the flour is incorporated and the mixture looks pebbly.
- Take the mixture out onto a lightly floured surface and hand mix it, until it all comes together, but be careful not to over mix it.
- Divide the dough into 8 equal pieces and pat them into small rounds. Place them on a parchment lined baking sheet, cover them with plastic wrap or a clean kitchen towel and refrigerate for about 20 minutes.
- Take the dough rounds out of the refrigerator and roll each one of them out into 6-7 inch circles. I honestly didn't need any additional flour on my counter to roll out the dough.
- Place 2 - 2 ½ Tablespoons of the peach filling into the center of the dough circles. If the dough is very floury, brush the edges with flour, so they will stick better. Fold the top of the dough over the filling and pinch of edges of the dough together, sealing really well, and making sure to get as much air out of the inside of the pies before you seal the edges. Also, try not to get too much of the peach liquid into the center of the dough, since you don't want it to be too wet, otherwise the edges won't adhere well and the hand pies will bust open.
- Use a fork to go around the edges and seal them even better. You will have 8 hand pies. You may have some peach filling left over. You can form all the peach pies and store them in the refrigerator up to 24 hours before frying them, or fry them right away.
Cooking the Hand Pies:
- When you are ready to fry the pies, pour in the oil into a large dutch oven and heat it up to 375 degrees Fahrenheit. Line a large plate with paper towels, so that you can place the fried pies on the paper towels to drain the excess oil.
- It is very important to heat the oil to the right temperature. If the oil isn't hot enough, the hand pies will soak up too much excess grease and the hand pies will be WAY TOO greasy. Yuck. If the oil is too hot, the outside of the pies will get golden brown too fast, but won't cook all the way through.
- When the oil comes to temperature, add 4 of the hand pies to the oil and cook for about 1 ½ minutes, flip the hand pies over and cook for another 1 ½ minutes. Keep checking the oil, adjusting the heat as needed, to maintain the temperature to at least 350 degrees Fahrenheit. Take the hand pies out of the oil and place them to drain on the paper towel lined plate. Return the oil to 375 degrees Fahrenheit and add the remaining 4 hand pies, cooking them for another 1 ½ minutes per side and then draining them on the paper towel lined plate.
- For the glaze, whisk the powdered sugar, milk and vanilla extract until you have a smooth consistency. I usually start out with 2 Tablespoons of milk and then add more if the glaze is too thick.
- Brush the glaze on one side of the hand pies. I usually only glaze one side, but you can glaze both sides. It's up to you. Cool for about 10 minutes before serving, so that the hot filling doesn't burn your mouth.
- Store at room temperature for up to 2 days, although they never last more than a day at my house:).

I've made these pies yesterday and they were ready to be fried but my baby didn't have any more patience to stay with me in the kitchen, so we went outside to play. It was late in the evening and my husband called to let me know that he's coming home so we went inside and I thought I could finish these pies and have them ready before hobby would come home. Nope, the baby was too tired by then and so I thought I would experiment and bake these pies in the oven instead. I preheated the oven to 375F and in about 20 minutes, wolaaaa these beautiful pies were baked to perfection! We loved them so much!!! They turned out flaky and the glaze just perfectly sealed the deal:) thank you, Olga😄
Thank you so much for taking the time to write, Lana. I'm so glad they worked out great in the oven too:).
These were HANDS DOWN the most delicious peach pies ever!
I really need to make these.
Thank you for sharing them with me 🙂
Thank you, Milana! I'm so glad you liked them. I love sharing my food adventures with you:). So much more fun!
hi i was wondering if you have the recipe to Bread & Buttered Pickles, and anything marinated or canned recipes. american recipe website aren't clear enough or to confusing to follow. so i was hoping maybe you be able to post it if you can. thanks in advance 🙂
I'm sorry, I don't have a recipe that I love for Bread and Butter Pickles. I've made them before, but don't make them very often. This is the pickle recipe that I love and make all the time. I hope you enjoy it.
I Love your recipes! And always look forward to see them in my email!!! Thank You sooooo much!!!
Thank you, Debra. I am so happy to hear that:).
Mmmmm wow olya another cool dessert recipe love peaches so very perfect for this time of year great way to use up any extra peaches love the pic of u @ a little girl you were so cute and btw Nathaniel is getting to be such a big boy and kudos to your dad and hubby for helping out happy father's day to the both of them will definitely hafta try makes me think of my great aunt Shirley she loves peaches too nice homemade summer gift so easy and yummy thanx @ always luv cheers
You are so sweet and thoughtful to make these for your aunt, Tzivia. I hope you both love these Peach Pies.
Awwwww thanx olya darlin yo she is a very sweet special person oh we sure will enjoy em gurl now I need to get myself a candy thermometer extremely important thanx for your reminder tips have a gr8 day and week cheers
Olga, thank you so much for sharing that story with us. It brought tears into my eyes! I'm soooo excited for this recipe. I dont know anyone who's more obsessed with peaches then me! Lol can't wait to make them! ☺️
I hope you enjoy them, Olesya:).
Oh yum! These must be so delicious! Unfortunately my deep frying attempts always turn out terribly 😮 Perhaps I need to get a thermometer. But the peach filling I will definitely make next time they are in season.
Such a blessing to come from such a loving family and to have that example from them for when you parent yourself. Nathaniel is very blessed to have you two as his parents I'm sure!
Frying without a thermometer is very hard! It's almost impossible to see if the oil is at a good temperature unless you have tons of experience and even then it's a hit or miss. But when you do use a thermometer, there's no guess work and so easy.
I hope you enjoy the peach filling, Sophie:). It's great on pancakes, crepes, French toast or yogurt.
These sound so delicious! What thermometer do you use? I need to get one and don't know what's good. Also, do you think there is any way to bake them and for them to turn out as good?
Thanks.
I would not recommend using this recipe for baking. It's specifically designed to be hearty and withstand frying. I would use regular pie dough if I was to bake these. They will not be as crispy though:).