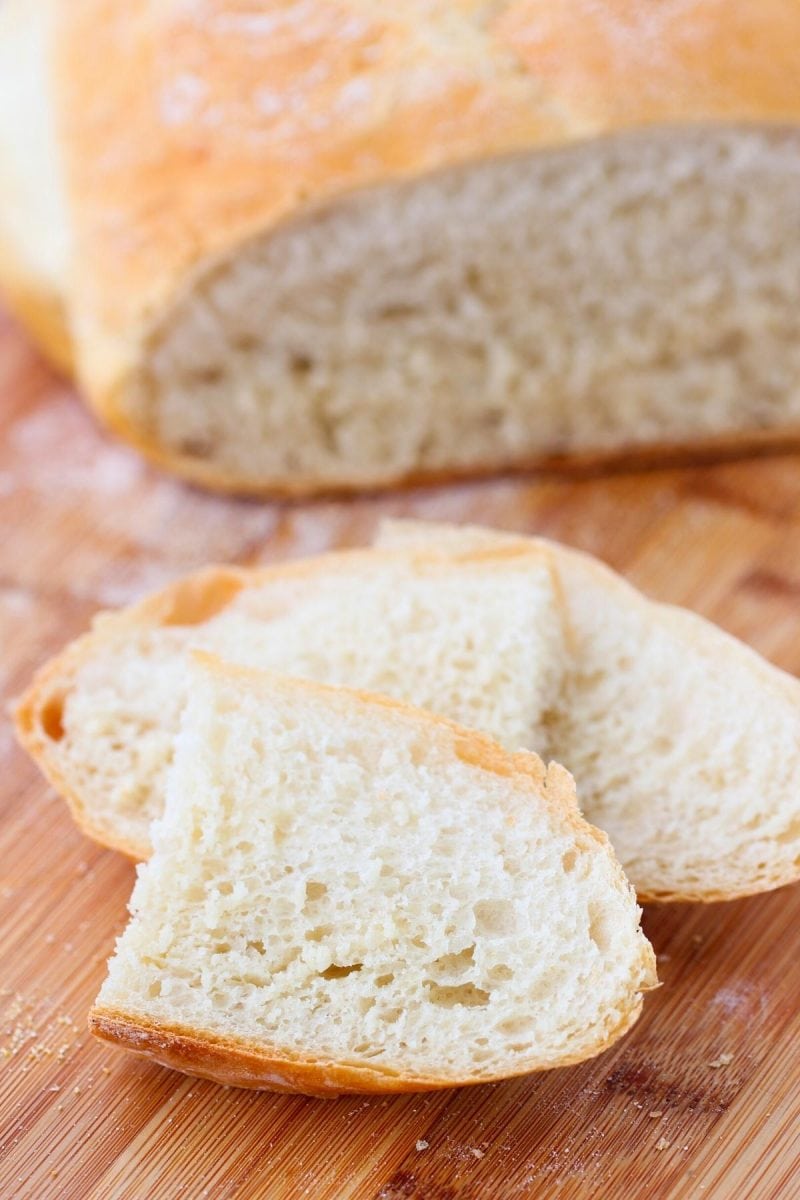
Crusty, no-knead bread is such an easy method of making bread with results that will rival a bakery. It's golden and crunchy on the outside, soft and chewy on the inside.
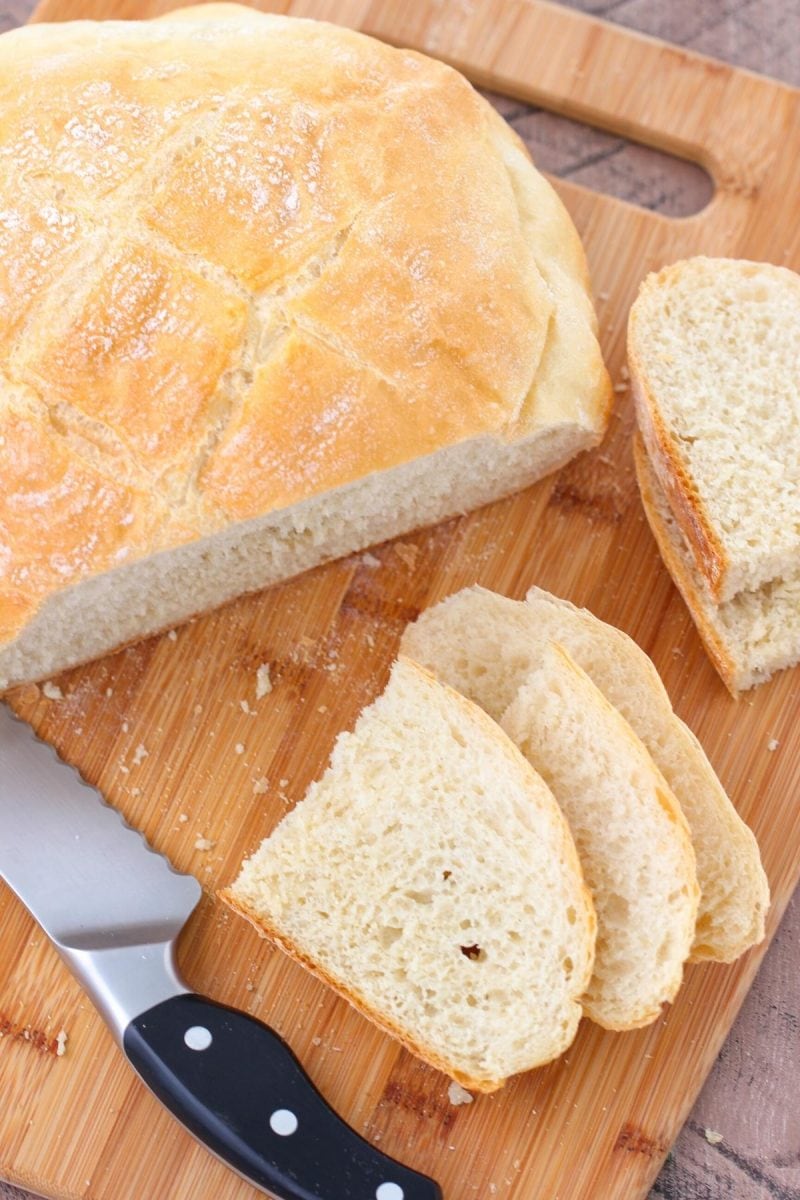
Homemade bread is magical. With a handful of very simple ingredients, and just a large mixing bowl, a wooden spoon and some muscles, you can mix up the dough, set it aside to rise and go about your business. There is no kneading involved and shaping the dough into a loaf takes just a minute or two.
The bread has a crusty and golden exterior and is so soft and just a bit chewy. It is perfect to serve with a warm bowl of soup, as the base of a sandwich and fresh out of the oven is the best of all. There are so many versions of this recipe and this is the one I have loved using for the past few years. I use a bit more flour than most recipes call for which helps the loaf rise more instead of spreading out, resulting in a softer inside texture and most importantly, a taller, rounder loaf.
No Knead Bread Recipe Video
Ingredients:
- warm water (100-110 degrees Fahrenheit)
- active dry yeast
- olive oil
- bread flour (or all purpose flour)
- salt
- cornmeal, optional, to sprinkle on the bottom of the parchment paper
How To Make No Knead Bread Dough
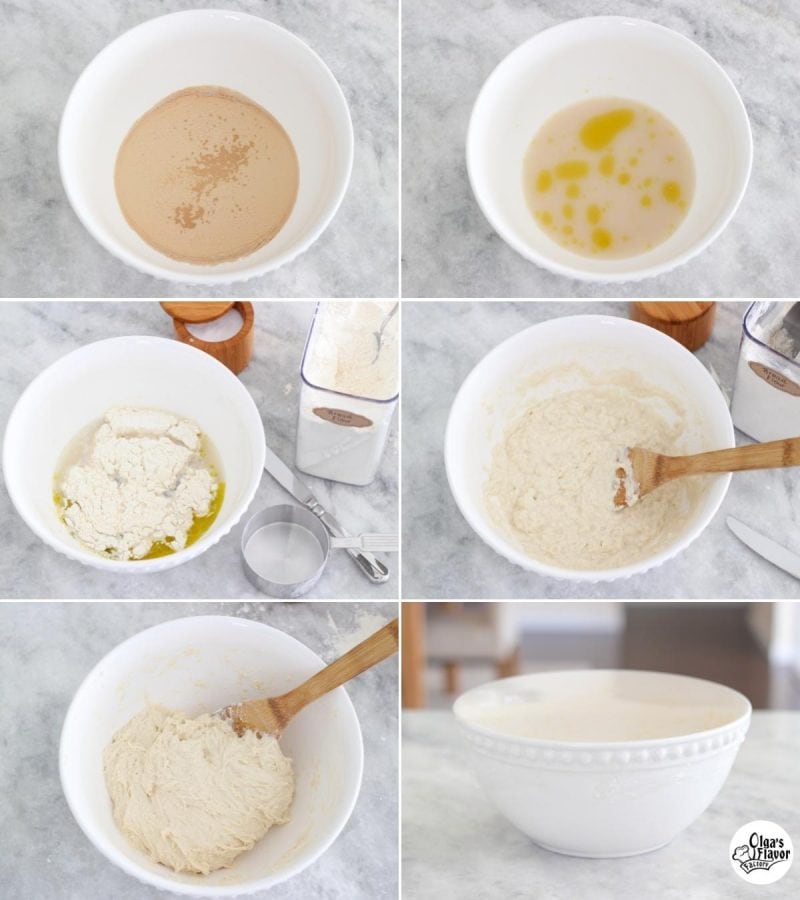
- Mix the water and yeast in a large bowl. Add the oil. Pour the warm water into a large bowl. Sprinkle the yeast into the water.
- Add the flour, 1 cup at a time, adding as you're adding the flour. I also use a bit more flour in my recipe for No Knead Bread than most other recipes I've tried, and it helps the bread rise better, makes the loaf softer and not as spread out. You may not need to use all the flour. After you add 3 cups of flour, add ¼ cup at a time until you have a dough that isn't too sticky and all the flour is incorporated. The dough should come away from the sides of the bowl.
- You can mix the dough by hand or use a stand mixer with a dough hook if you don't have a lot of strength in your arms. I think that a wooden spoon is the best tool for mixing the dough by hand in the beginning. You can use your hands if you want to at the end if it's easier for you.
- If you're mixing the dough in a mixer, you don't have to knead it very long at all. This is mostly if you need some extra help mixing.
- Set aside the dough to rise until double. Cover the bowl with plastic wrap or a towel to keep it from drying out. it will take 45 min - 1 ½ hours, depending on how warm your house is.
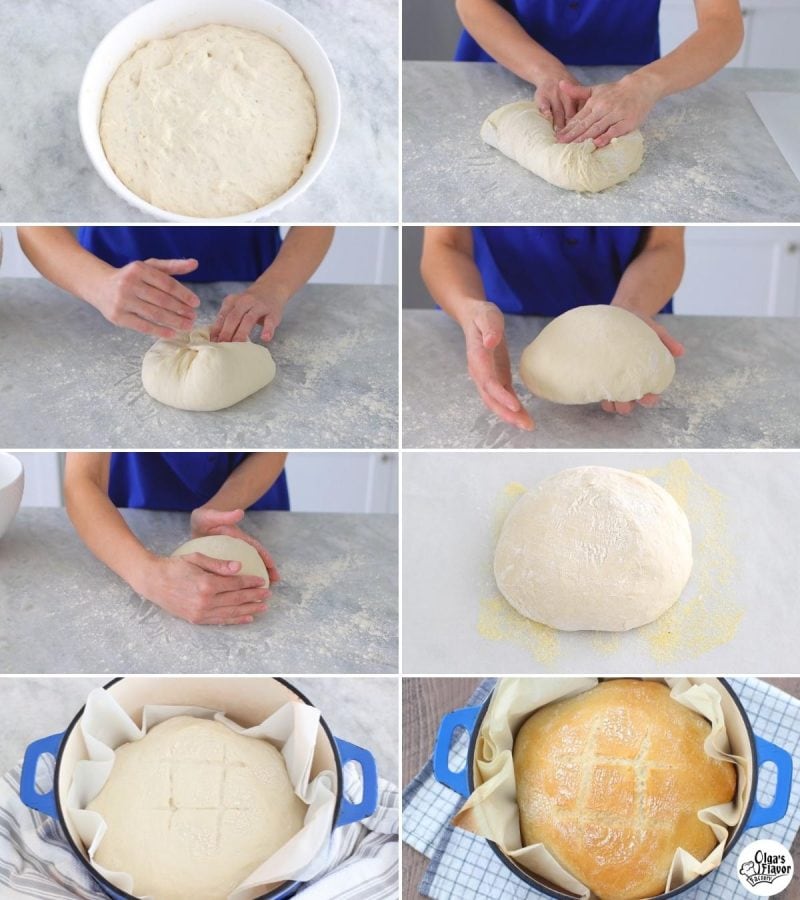
Shaping and Baking the Bread
- Sprinkle the counter with flour and place the dough on the flour.
- Shape the dough into a ball. Take the edges of the dough and fold it inward, towards the center, then take more edges, folding inward, until you have a neat loaf. (Watch the video to see this in more detail.) You should have a neat little loaf of bread.
- Turn the loaf over, seam side down, lightly shaping it more between your two hands.
- Place the bread on parchment paper sprinkled with cornmeal (if using). Set aside to rise until double.
- Preheat the oven to 500 degrees Fahrenheit. Place your Dutch oven into the oven at the same time so it gets really hot too.
- When the bread has risen, reduce the heat to 425 degrees Fahrenheit. With a sharp knife or razor, make a few cuts in the bread. Make a simple X or hashtag or something more fancy if you're creative. Transfer the bread dough on the parchment paper to the hot Dutch oven and cover with the lid.
- Bake for 25 min. Uncover and if it's still pale, bake for another 5 minutes or so.
- Fresh bread will cut better when it has some time to cool off.
- Store the bread at room temperature wrapped in a towel, inside a paper bag or a large ziplock bag. Homemade bread is best the first few days, but will last for about 5 days.
What Flour is Best To Use For Bread?
Bread flour is the best for this recipe, however, all purpose flour will work in a pinch. Bread flour has a higher protein content, which means it develops a lot of gluten and provides more structure for the bread and makes it more chewy.
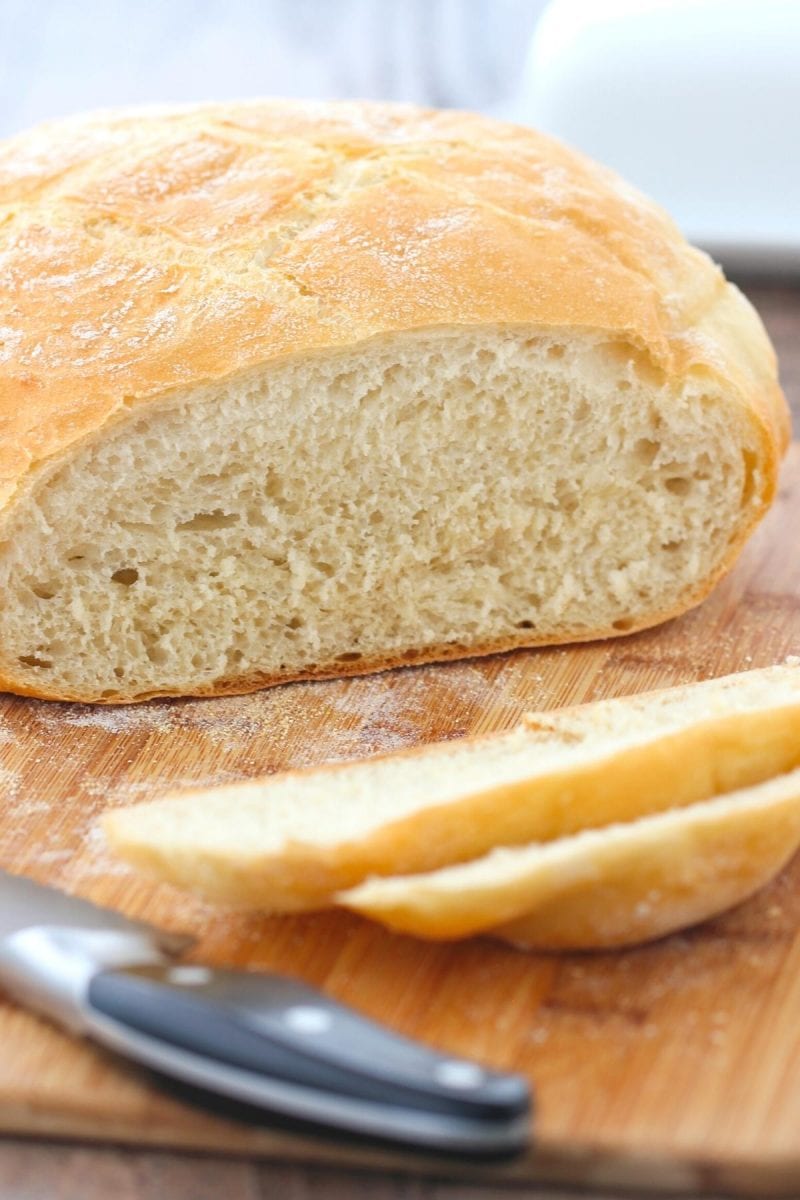
Crusty No-Knead Bread
Crusty, chewy and soft - this no-knead method of making bread is so easy with results that will rival a bakery.
- Prep Time: 120 minutes
- Cook Time: 30 minutes
- Total Time: 150 minutes
- Yield: 1 loaf 1x
Ingredients
- 1 ½ cups warm water (100-110 degrees Fahrenheit)
- ¾ Tablespoons active dry yeast
- 1 Tablespoon olive oil
- 3 ½ - 3 ¾ cups bread flour (or all purpose flour, plus more to sprinkle on the counter)
- ¾ Tablespoons salt
- cornmeal (optional, to sprinkle on the bottom of the parchment paper)
Instructions
- Pour the warm water into a large bowl. Sprinkle the yeast into the water. Mix to combine. Add the olive oil.
- Add the flour, 1 cup at a time, adding salt along with the flour. (Bread flour is the best for this recipe, however, all purpose flour will work in a pinch.) You may not need to use all the flour.
- Mix with a large wooden spoon until all the flour is incorporated.
- Cover the bowl with plastic wrap or a kitchen towel. Set aside to rise until double in size, 45 min - 1 ½ hours, depending on how warm your house is.
- Place a piece of parchment on the counter and sprinkle the center with some cornmeal. The cornmeal is optional. It will give a nice crunch to the bottom of the bread.
- Generously sprinkle the counter with flour and transfer the risen dough onto the floured surface. Fold the corners of the bread inward, shaping into a loaf. Turn it over seam side down. Sprinkle with more flour on top.
- Transfer the shaped loaf of dough and place it onto the center of the prepared, cornmeal sprinkled parchment paper.
- Cover loosely and allow to rise at room temperature until double in size, another 45 - 1 ½ hours, depending on how warm it is in your home.
- Preheat the oven to 500 degrees Fahrenheit. Place a dutch oven with the lid, a pizza stone or a large baking sheet into the oven to preheat along with the oven. I've used all of the above for this bread and they all work really well. I prefer the dutch oven, but you can use a pizza stone or baking sheet too. The bread will have the best shape and will have the most crunch if you use the dutch oven. The pizza stone is another great option that I often use for bread. It will also make the outside of the bread crunchy, but it will spread out a bit more. The baking sheet will also work, but the bread will not be as crunchy and will spread out more than when baked in the dutch oven.
- When the bread has doubled, use a sharp knife to slash an X or hashtag along the top of the dough. Slashing the dough will help the steam to escape so the loaf bakes evenly, without splits and cracks.
- Use the edges of the parchment paper to pick up the bread and lower it into the hot Dutch oven. Reduce the heat to 425 degrees Fahrenheit. Cover with the lid and return to the preheated oven. Bake the bread for 25 minutes, then remove the lid and bake for another 5-7 minutes, if needed, until the crust is as golden brown as you like.
- Remove the bread from he Dutch oven using the edges of the parchment paper and allow to cool on a wire rack.


Hi Olga,
How long does it usually take for the bread to rise to lower temp to 425? I'm assuming it's different with each oven.
Thank you
It's different for each oven, Barb. However, once you preheat the oven along with the Dutch oven to 500 degrees Fahrenheit, you do not need to wait for the oven temp to get to 425 before putting the bread it. It needs a blast of heat to start baking, so you would put it in right away, decreasing the temp and it will gradually decrease to the needed temperature. The bread will be protected by the Dutch oven and you want that high heat to get a nice rise and get a crunchy exterior. It would be too hot to bake it the whole time at 500, that's why you need to decrease the temp.
If you bake this bread on a pizza stone, would you bake it at the same time as a dutch oven? Thanks
If you use a pizza stone, it will take approximately the same amount of time, but you may need to adjust the time slightly. I haven't baked it on a pizza stone in years, so I don't remember exactly how long it took to bake the bread. I would start with 25 minutes and then bake it longer if it's not as golden and brown as you like.
Delicious bread and perfect everytime. Love how easy it is to make. Thank You Olya!
I'm making this now and wondering if it's 1 tablespoon of salt or maybe a teaspoon? Sounds like too salty for me..
Also, when I doubled the recipe, the temperature for water also doubled lol.
Great recipe. Thank you. The only thing is it was hard to slice it. Maybe it needs to cool down completely? It could also possibly be my knife. Could you recommend a good knife for slicing this bread?
Can i use sourdough starter instead of yeast, and if yes, would you give me an idea if how much of it I’d need.
Thank you 🙏🏻
Btw, i LOVE your food blog
You probably can, but you would need to experiment yourself. I don't have a sourdough bread recipe posted, I've always made it by look and feel and don't have a written recipe for it.
Can you make this with Canadian flour?
I have never used Canadian flour and don't know what structure it has.
Im just wondering if it possible to double the recipe, it seems like not to big loaf of bread.
It's 9 1/2 - 10 inches in diameter. I would say it's a good size, a bit bigger than most of the loaves that are sold in the store.
If you want to make it bigger, you will need to use a bigger dutch oven or a pizza stone to bake the bread and will need to bake it longer.
how much is 3/4 tablespoon of yeast
A little bit less than 1 Tablespoon.
Olga, i made this today and it was a super hit. So yummy. Thanks for the recipe
I'm so happy that you were happy with the bread, Smitha. Thank you for taking the time to write.
Would a smaller Dutch oven work for this?
The bread won't fit into a dutch oven that is smaller than 5 1/2 - 6 quarts, Mariya.
Just made this and I gotta say That this was the easiest bread recipe I’ve ever made and also so delicious 😋 thank you Olga for sharing this bread recipe !!!!
I'm so happy to hear that you enjoyed it, Alena. Thank you for taking the time to write.
Delicious!!! Recipe works great! Thank you Olga!
I'm happy to hear that, Ecaterina:).
This brear is very easy to make and it's very delicious!!
I love how simple it is to prepare too, Inna. Thank you for taking the time to write.
Hi, do you think whole wheat flour will work for this recipe too?
I have never tried it for this particular recipe. I would suggest using only part whole wheat flour and the rest bread flour or all purpose flour.